Small changes in your skiing can make a big difference !

Being a Ski Coach puts me in an interesting position when learning new Sports. One of the most important is that it reminds me what it feels like to be a ‘beginner’ which in turn lets me improve my ski teaching.

One of my new passions is Indoor Climbing which I started about a year ago. A couple of things come to mind that are relevant to those who want to improve their skiing:

Firstly, my climbing has improved with my fitness. As my upper body and finger strength has increased with practice so I’ve been able to take on harder and harder climbs. It’s pretty obvious, but a simple way to help improve your skiing is to get fit! For me this usually involves plenty of Hill Walking, Gardening and Indoor climbing.

Secondly, climbing has reminded me how SMALL changes in technique can have a BIG impact in success or failure. In climbing you are either make a ‘move’ successfully or fall, so it’s easy to see if a change in technique make a difference. For many beginner and intermediate skiers it’s likely that if you can make some quite small technical changes to your skiing and feel a BIG difference. You will need the help of a Coach or Instructor to assist you in identifying the best for you, but posture and fore/aft balance is often a good starting point.

However, the real value of your Coach or Instructor will be in helping you to make the change.

Ski Boot Fitting

On our last skiing holiday my wife had some problems with her ski boots. By the end of the 3rd day her feet were red sore and skiing was no fun at all.

With Winter fast approaching ( and more like here if our weather is anything to go by 🙁 ) I decided to get her down to a specialist ski boot fitter to try and fix the problem.

Word of mouth (or more accurately posts on a popular ski web forum) guided me to Colin Martin who runs Solutions for Feet in Bicester, Oxfordshire. Colin is a certified Pedorthist (C.Ped), a skier and instructor who has spent many years specialising in fitting and customising ski boots.

Colin examined my wife’s feet and ski boots and it quickly became apparent after testing and measuring that there are 2 big problems. The first is that her boots are 2 sizes too big, and the second is that she has tight calf muscles which reduces her ability to flex at the ankles, a key skiing movement.

Colin proceeded to check my boots. I wasn’t surprised to find my boots are also 2 sizes too big as my buying decision was influenced by the unbearable pain inflicted on me by my 1st pair of boots. I was surprised to hear that I could also do with working on my calf muscles to loosen them up. Luckily for me my ski boots feel fine although the liners will wear out quickly.

Unfortunately for my wife the only solution for is a new pair of correctly fitted boots and some stretching exercises.

For many skiers buying ski boots is fraught with problems as I know from personal experience.

However today proved to me that it is worth taking the time to search for someone who is skilled and experienced enough to suggest the most appropriate ski boot for you and your level of skiing, AND have the skills to craft and tailor your ski boot to your foot.

With the vast range of boots available from the many and varied ski boot manufacturers, the trick is to select a boot with a plastic ‘shell’ that matches your feet as a starting point. Small adjustments can then be made to the shell and liner for a perfect fit.

A couple of visits back to the boot fitter to fine tune the fit will leave you with comfortable, perfectly fitted boots which will help you ski more effectively and will as likely as not, last longer too.

The result of ill fitting ski boots.

PS. No ski boots were purchased in the making of this blog. Yet.

NatureMill – Clip Fix update

Looks like the ‘clip fix’ failed. The unit still refuses to transfer waste from the top chamber to the collection tray.

The issue seems to be the design of the clips. The new ones have been bent over by the mixing arm, but the arm needs to catch on the clips when it transfers.

NatureMill are aware of the problem and have some new clips in development and in an email they have promised to ship me free replacement ones when they are ready. However they are not due until August so it looks like the NatureMill experiment is on hold for a few weeks.

I’ll update you all when they come through.

NatureMill – Clip Fix

This weekend I replaced the broken clips which had caused a problem with the NatureMill. The machine had stopped transferring waste from the top compartment to the bottom.

The replacement clips arrived via UPS from the States, sent directly from the clip manufacturer. NatureMill had emailed me the instructions for replacement. Before starting the repair I dumped it’s contents on our compost heap and hosed the machine down to try and make the job as pleasant as possible.

The instructions were mostly fine, and taking the machine apart went OK. The only ‘issue’ was how the new clips actually fitted. The old ones had completely broken and there was no hint as to how the new ones went in. In the end I had to refer back to the photo’s I took when the unit arrived and luckily there was one which gave the answer.

Fitting the clips was OK once I’d managed to free up the trap door. The main thing is not to accidentally throw out the small plastic grommets which help secure the clips with a friction fit. The instructions also suggest ensuring the trapdoor ‘arms’ are parallel, so I checked and bent them as required.

Reassembly is disassembly in reverse. Because I’d hosed the unit down I decided to restart the composting process from scratch and I reset the NatureMill when I powered it up. I added some chippings and soil and eventually the machine went in to ‘Mix’ mode. The the clips seem to have held OK.

The real test will be if the transfer function works and how long the clips last for. 4 months is the record so far. Fingers crossed !

Photo of the original clip which broke after 4 months causing the transfer tray to fail.
Disassembled transfer tray with new clip fitted.
Inside view of the NatureMill reassembled with the new clips.

NatureMill – Good News and Bad News

Good news on the Nature Mill. I’ve been testing the unit with an alternative to the saw dust I bought after the saw dust pellets which shipped with the machine ran out.

When the original pellets ran out I popped down the local pet shop and picked up a bag of sawdust for pet bedding. However it seems that this type of sawdust isn’t helping the smell issues I’ve been having with the Nature Mill. I’m unsure as to why, other than perhaps its pine softwood.

During the Winter I had a couple of big Pear trees behind the house heavily pruned and the Ivy removed. The job left behind a large pile of finely cut wood chippings which have started to compost down. So I fed the Nature Mill with a couple hand fulls from the chippings pile and the results have been encouraging. A smell is still there when the lid is opened but it’s a bit more pleasant.

The bad news is that the machine has stopped transferring from the top chamber to the bottom one which means that I’ve not been able to test the wood chippings over a full cycle. I found a broken clip which must the the cause of the problem.

The good news is that the Nature Mill company in the US have been very helpful and redesigned replacement clips are on their way. The guys emailed the instructions for replacing them but it looks a messy job as the unit has to come apart.

I’ll let you know how it goes . . . . .

The chippings pile from the Pear Tree and Ivy pruning. Hard wood rules for the NatureMill……Maybe !

Avalanche Accident Prevention Card

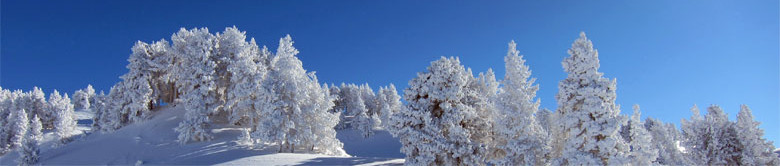
Earlier in the year I took part in some research for the Canadian Avalanche Centre who in collaboration with the Simon Fraser University were conducting a study on avalanche awareness of out-of-bounds skiers and snowboarders. The goal is to develop better avalanche awareness materials for this group.

Analysis of the data collected is ongoing but as a thank you they sent me a copy of their pocket book and reminder card entitled “Avaluator” which was based on initial research cumulating in 2006. I received mine in the post yesterday and it looks to be a useful tool to aid decision making and a check list for those venturing off piste.

Obviously this type of publication is no substitute for training and using a guide but it aims to provide skiers and boarders with a tool which will enable them to avoid obvious mistakes and “set them on a path of learning and practising good habits”.

For more information see the Canadian Avalanche Centre web site at:

http://www.avalanche.ca/default.aspx?DN=428,4,558,3,Documents

And Pascal Haegeli’s site at:

http://www.avisualanche.ca/adfar1/avaluator.html

Update:

Following a couple of emails to Pascal, he comments:

“The Avaluator combines two methods for personal risk management on backcountry trips in avalanche terrain.

The Trip Planner allows the user to pick reasonable trip destinations based on the regional danger rating from the avalanche bulletin and a trip rating that expresses the exposure of the trip to avalanche hazard in general. For more background in terrain ratings visit:

http://www.pc.gc.ca/pn-np/ab/banff/visit/visit7a1_e.asp
http://www.avalanche.ca/default.aspx?DN=646,428,4,558,3,Documents

The Obvious Clue Method was developed by Ian McCammon based on US avalanche accident data. The idea is that the more clues are present, the more similar your situation to past avalanche accidents. You can find more background on this method in the following papers:

http://www.avisualanche.ca/downloads/2004_ISSW_DecisionFrameworks.pdf
http://www.avisualanche.ca/downloads/2006_ISSW_McCammonHaegeli.pdf
http://avalancheinfo.net/ADFAR%20Proj%20Docs/CAAReviewEuropeanDecisionFrameworks.pdf

There are two parts to the recommendations of the Avaluator:

1) The colors on the Trip Planner Chart and the Obvious Clue Scale (green-yellow-red) are expert recommendations about what level of training and experience is necessary to safely travel in avalanche terrain under the given conditions.

2) In the booklet we also provide estimates on the percentage of historic US avalanche accident that could have been prevented if the accident parties would have followed these guidelines. A comparison of US and Canadian avalanche accidents showed that their characteristics are comparable and these percentages are applicable in Canada as well.

So while the Avaluator contains some common sense recommendations, the user should be aware that the recommendations were developed by North American experts and that the percentage of prevented accidents is based on North American accident statistics.

The Avaluator does not have any capabilities to predict individual avalanches. It is built on historic avalanche accidents from North America and its goal is to make users aware of conditions that have resulted in accidents in the past. The recommendations of the Avaluator provide the users with a sense of how much training and experience is necessary to safely travel in avalanche terrain under different conditions. The Avaluator provides a new accident perspective to complement the existing avalanche safety methods such as snow science, group management and rescue skills.”

Stairs, Feedback and Skiing.

Winter and skiing seem a long way away sitting here with the sun shining and a gentle breeze blowing across the garden.

Even though it’s early Summer there are things we can do to help set up our skiing for the Winter. Perhaps one of the simplest is walking up the stairs. It’s the perfect chance to develop a key skill which will speed your up skiing development, it’s free and one no one need know !

In order to climb the stairs you need to use your legs effectively, as you do when skiing. Because you’ve been walking up stairs quite successfully for years it’s likely you don’t give it a second thought, but if you think about it the movements you make are actually quite complex.

So the next time you walk up the stairs try and pay close attention to feelings you get from your feet and legs. Are you stomping ? Is your footfall soft ? Where are your feet landing ? Does the left feel different to the right ? Use all the ‘feedback’ mechanisms available to you. Feel, listen and maybe take a quick look at what’s going on too.

Then walk up the stairs again. This time modify your movements based on what you have just felt. Maybe make your steps softer, or their placement more accurate. Or if you noticed a difference between the left and the right see if you can even it up. Each time you walk up the stairs or go for a walk, try and be aware of your footfall and how your legs are moving.

This simple activity helps you develop your ‘internal’ feedback skills, in this case a heightened awareness of what your legs and feet are doing. This is a key skill which will help you improve your skiing. By accurately feeling what’s happening under your feet means that you are able to modify your movements and make fine adjustments, and then feel the difference.

When you get back on skis this will pay dividends. Your heightened awareness of whats happening under your feet will enable you to know better how you are skiing. You can then change how you are skiing and feel the difference. When working with your ski Coach or Instructor you will be able to compare your ‘internal’ feedback, i.e. how your performance felt to you, to your Coaches verbal feedback, how your run it looked to him.

By having more accurate information and a fuller understanding of how you are skiing you will be able to progress faster.

Negative Reinforcement in skiing

I just caught a section of Derren Brown’s ‘trick or treat’ program on Channel 4 and the theme was negative reinforcement.

He was conducting an experiment with a tight rope walker, a good one at that, not only could he walk a tight rope, he could skip at the same time. . . . . . .

After seeing the guy do his stuff on the high wire Derren Brown asked him to repeat the performance, BUT while thinking “I must NOT fall”. The “Do NOT fall” message was reinforced by adding an inflatable crash mat and Derren Brown repeated the instruction “Do NOT fall” several times and just before he started.

Guess what ?

The same tight rope walker who had a moment ago walked the high wire, skipped with a skipping rope and all without any safety net “went to pot”. His balance was poor, his movements less accurate and eventually he fell to the mat.

This graphically demonstrates how focusing on a negative element of your performance simply reinforces that negative. In the case of the tight rope walker, focusing on “not falling” caused him to eventually fall.

So in a simple skiing example, when your ski instructor says “Don’t let your hands drop back” and you keep that as your focus on your next run, as likely as not you’ll end up doing exactly the thing you were trying to avoid and the instructor was trying to address.

For success it’s far more effective to focus on the positive. In the case of the “hands” a more helpful instruction from the Instructor, and focus for you could be “Keep your hands forward”.

It’s all to easy for instructors to fall into the trap of using ‘Negative’ instructions with their clients, so should your Instructor say “don’t do” such and such, gently turn the request around and ask them to tell you what you should be doing !

ps. It should be possible to see the program again for 30 days using C4s on demand service – see http://www.4od.com

NatureMill Update

It’s been a few weeks since my last NatureMill update. The main reason for this is that I’ve had little positive to report.

Since restarting the machine in February after our holidays I’ve not been able to get it working ‘as advertised’.

There are 2 issues, the main one being the smell. While most of the time the machine does not smell, boy does it pong when you put something in. The other problem is condensation which results in wet compost and gets into the air filter, which possibly contributes to making the smell worse.

I’ve contacted the NatureMill guys in the USA for guidance on several occasions, but the response is much same each time “Add more sawdust and baking soda”. Just to be sure I’ve reset the machine, started the ‘cultures’ from fresh with soil from the garden and left it to settle for a week with out adding food.

According to the instructions you need to add 2 tablespoons of baking soda and a couple of hand fulls of sawdust at the start of each compost batch. I’m adding sawdust and baking soda pretty much every other time we add waste. As there are just 2 of us we don’t produce much, adding mostly bread, some peelings or veg that’s gone over in the fridge. With light use compared to a family the extra sawdust and soda seems a little excessive, and worse seems to make no difference.

We have produced a few batches of compost, but it looks nothing like the compost in the NatureMill video. It’s wet and I’d be loathed to put my hands in it. I’ve been adding it to my garden compost bins to kick start the grass clippings but it’s too early to say if it helps.

All in all at $300 the NatureMill has been disappointing. I’ll carry on using it, as the smell is not too much of a problem in our Veranda (and I can’t very well ship it back to the states) but I could not recommend having one in a kitchen or small apartment. In our experience the pong will be too much !

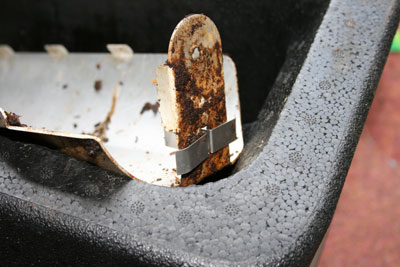
Before the NatureMill arrived we used a low-tech solution, a mini bin from Ikea. The lid seems airtight, there were no smells, and it held our green waste until the weekend when I added it to the garden compost bin. Best of all it offers a saving of $290 over a NatureMill 😉
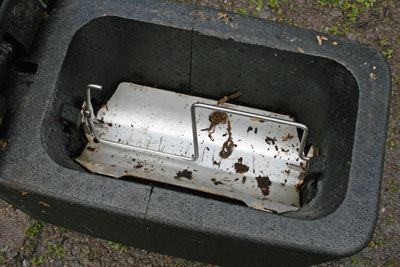
Lot’s of cooked food waste ? Buy Chickens ?